How to Measure for a Toilet – Rough-In Dimensions
Table Of Contents:
- Getting Started
- Standard Toilet Dimensions
- How to Measure Toilet Spacing
- How to Choose a Toilet That Fits
- How to Measure for a Toilet Seat
- Understanding Bathroom Partitions
- How to Measure Bathroom Partitions
- Designing Your Bathroom Space
Getting Started
To get started measuring for your toilet, you’ll need:
- Measuring tape or a ruler
- Something to write with
- Paper or a notepad
Standard Toilet Dimensions
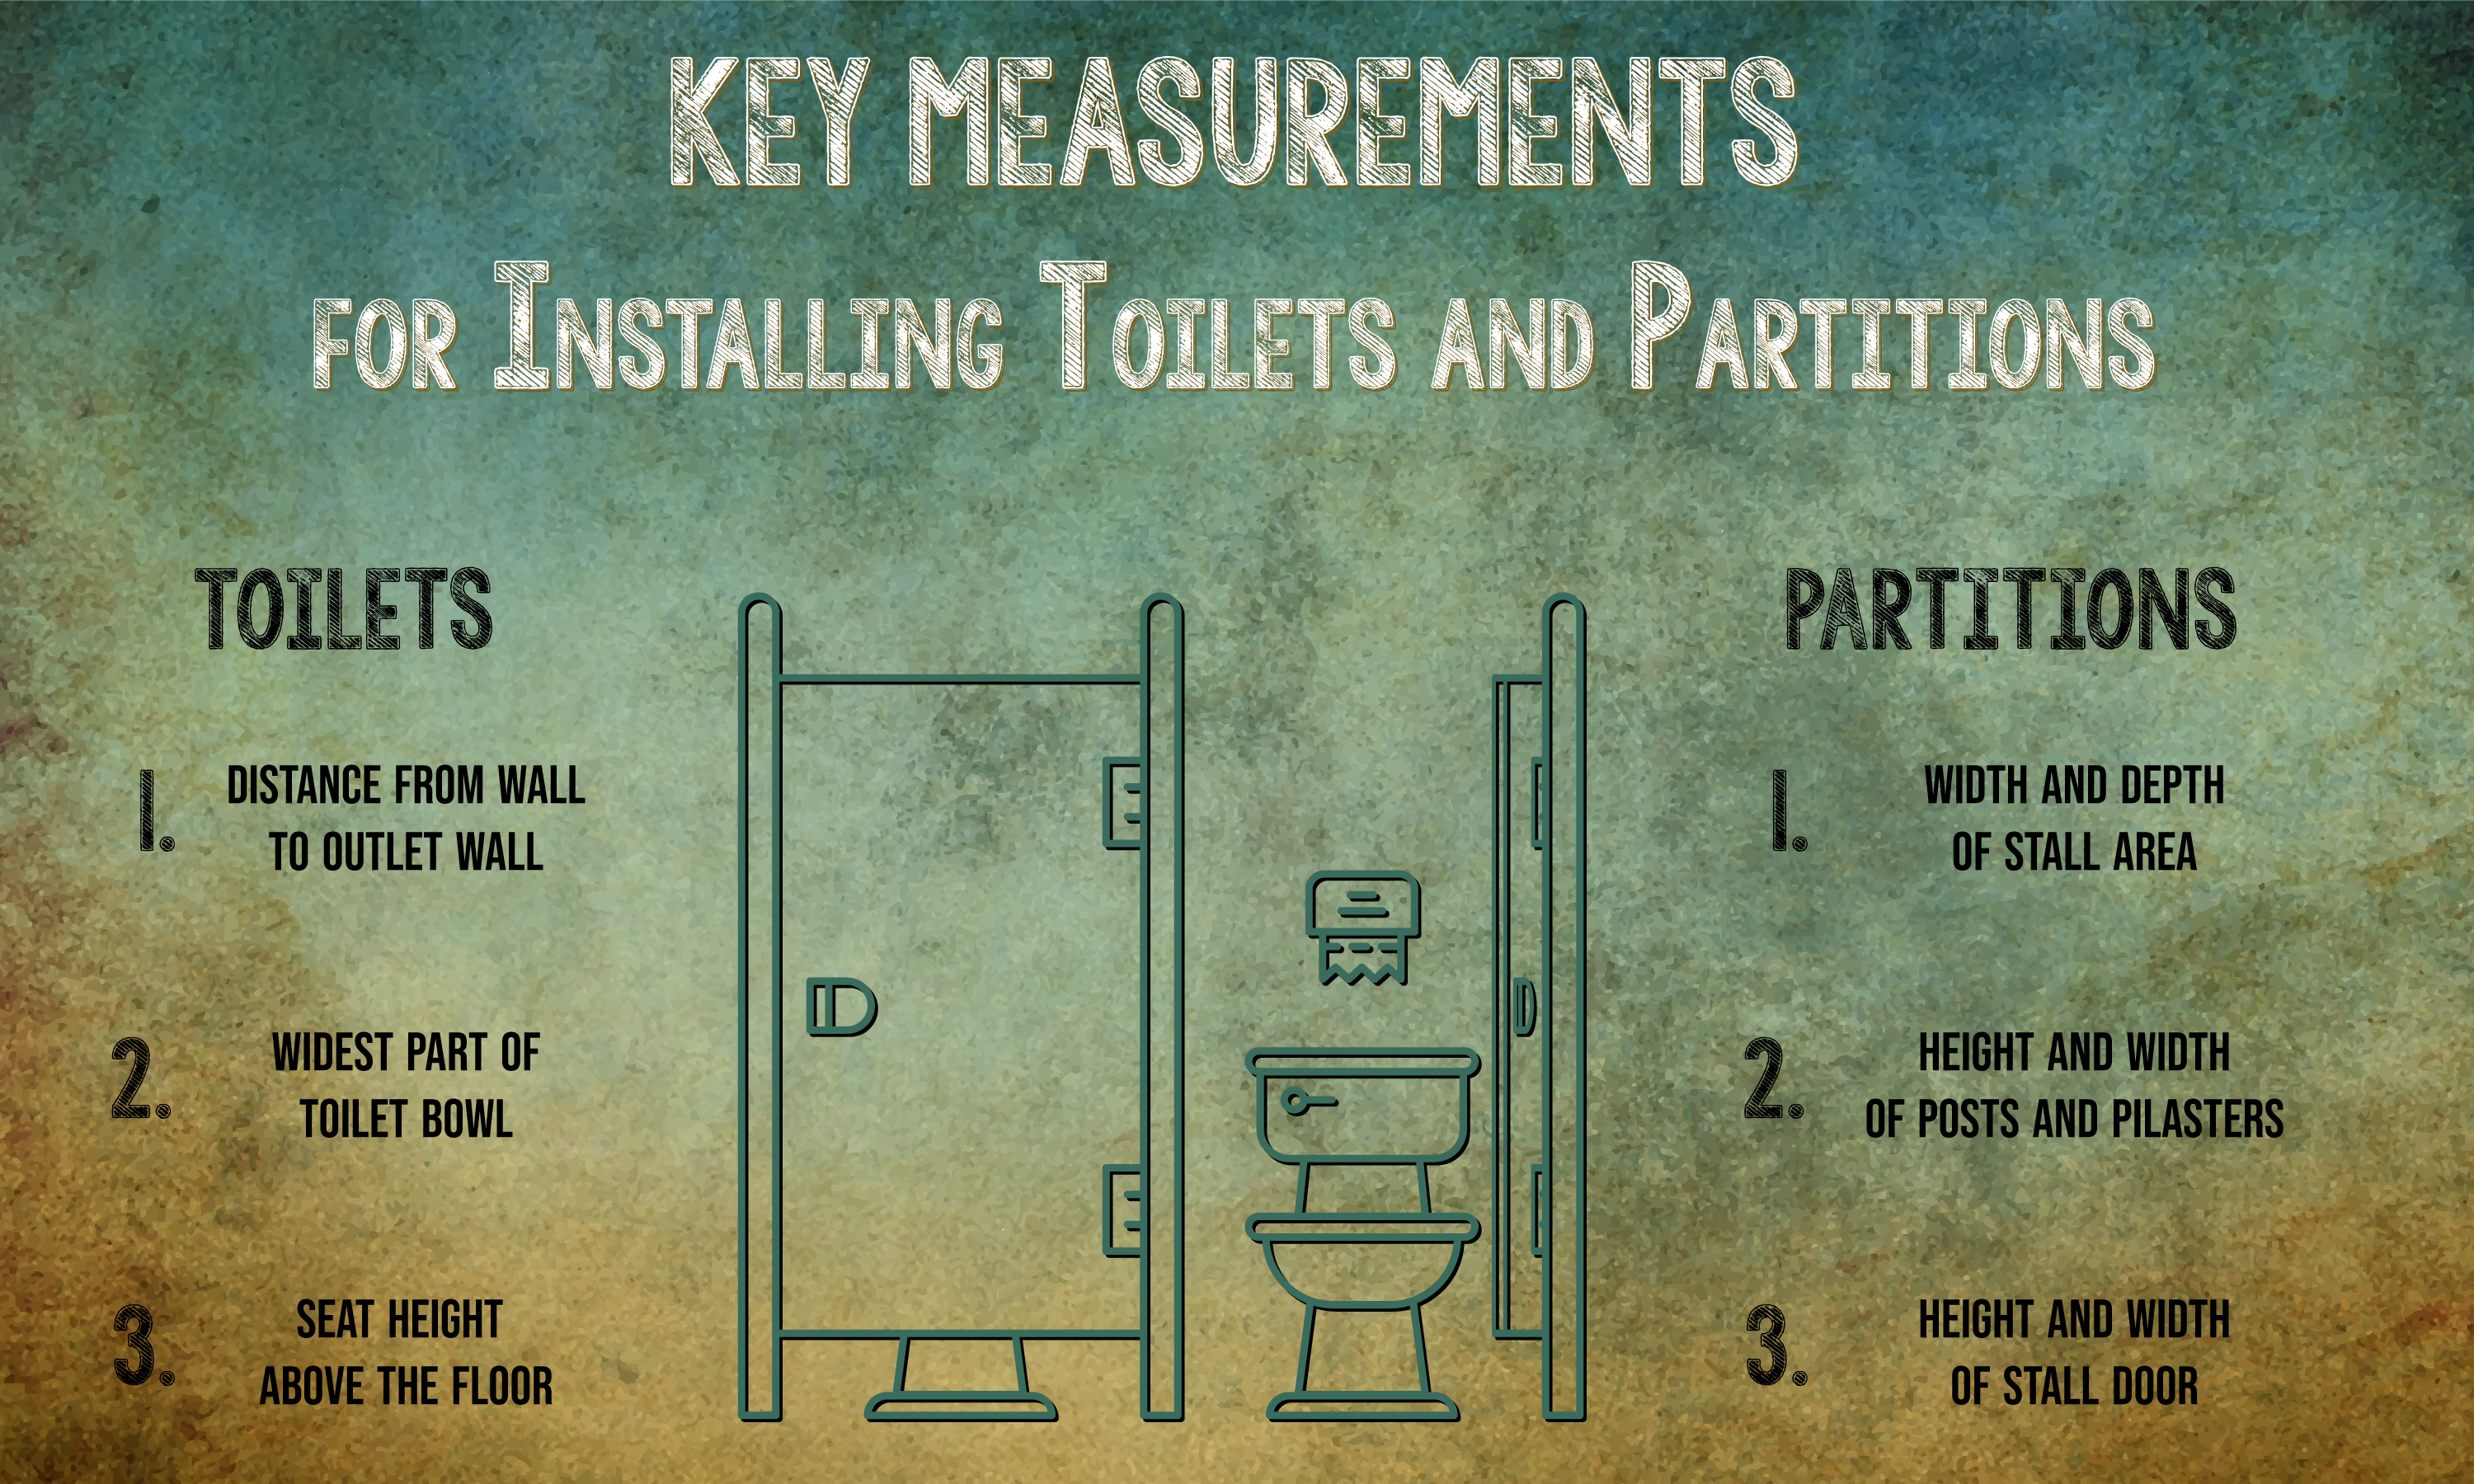
When you are considering your bathroom layout so you can add toilet partitions to a bathroom in a park, school, office, or other space, you need to measure carefully. You want users of your restroom to have adequate space in each stall without wasting any usable area. This toilet buying guide will walk you through the standard toilet measurements you need to consider when buying partitions:
- Seat height: Measure the space between the floor and the toilet seat top. Standard toilets will measure between 15 and 17 inches, while chair-style toilets can be up to 17 inches.
- Toilet bowl shapes: Round toilet bowls take up less room than elongated bowls, which are usually up to three inches longer. Remember, you will want to have 24 or more inches of space in front of the toilet as well as adequate space around the bowl.
- Toilet width: Measure either the widest part of the bowl or the widest part of the tank, whichever is broader, to determine the required width of each stall. Keep in mind you need some space on the sides as well.
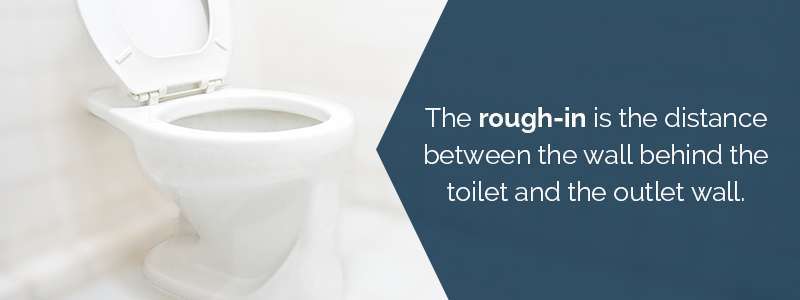
- Toilet Rough-In Dimensions: A toilet’s rough-in measurement is the space between the wall behind the toilet and the center of the waste pipe. Standard toilet rough in dimensions are 12 inches, but can be anywhere from 10 to 14 inches in some cases.
Overall, a standard toilet will be between 27 and 30 inches deep, with a back height of 21 to 31 inches and a width of about 20 inches. An ADA-compliant version needs to have a seat height of 17 to 19 inches. This is one reason why partitions around ADA-compliant bathrooms are different.
When calculating space around a toilet in an ADA stall, you also need to consider extra space for a wheelchair or an assistant. The toilet should also be near a grab bar, which can be used to assist someone using the facility.
How to Measure Toilet Spacing
If you’re measuring for an all-new bathroom space or hiring a commercial bathroom contractor to completely remodel a bathroom, you’ll want to have an idea of the overall layout and design of the bathroom. If you’re designing for a business or public restroom where there will be multiple toilets, be sure to leave space available for partitions and partition doors. When considering how to measure for toilet space, here are a few things to keep in mind.
- Always measure the maximum. Be sure to always take your measurements at the widest or longest point of the bowl. This principle applies to everything except bolt hole measurements, which you should take from center to center.
- Check it once, check it twice. Be sure to double-check all your measurements. Before you order a toilet or toilet seat, you want to be sure your measurements are correct. The last thing you want is to order a product that won’t work for your space.
- Keep safety in mind. While it might be tempting to stand on the toilet bowl or seat while taking measurements or installing your toilet, it’s easy to slip and fall. Avoid accidents and injuries — keep your feet on the ground, and never stand or squat on your toilet.
How to Choose a Toilet That Fits
Once you have all your materials and your overall bathroom design in mind, one of the first steps to remodeling a bathroom is to start measuring. When it comes to how to measure a toilet seat, you’ll need to collect the following measurements: Rough-In Dimensions: The rough-in is the distance between the wall behind the toilet and the outlet wall. This measurement is the most critical one you’ll make when measuring for your toilet. Knowing the correct rough-in size will ensure your toilet will fit and work correctly.
To measure the rough-in for your toilet, measure from the wall behind to the toilet to the middle of the closet bolt caps on your current toilet. The closet bolts are the bolts holding your toilet to the floor. If you have baseboards or tiling on the wall behind the toilet, do not include those in your measurements. If your toilet has four bolts rather than the standard two, you’ll measure to the center of the rear bolts. The standard rough-in measurements are 10, 12, and 14 inches. If your measurement is in between these intervals, round your number down to the nearest standard measurement. Most toilets will have a 12-inch rough-in. Toilets with a 10- or 14-inch rough-in measurement are a little less common, so you might have less of a selection of toilets of this size. If you’re replacing an existing toilet, look for a replacement toilet with the same rough-in. A toilet with a larger rough-in measurement will require you to change your plumbing configuration or move the wall to get the toilet to fit. In some settings, like a bathroom with multiple toilets, you might not have much flexibility to be able to move the plumbing or change the layout. While a smaller toilet will fit, it will leave a significant gap between the toilet and the wall. If you store items on top of your toilet, this gap may not be ideal, since you might end up dropping things behind the toilet.
Toilet Bowl Dimensions
Next, you’ll need to look at the width and length of your bowl. In the United States, bowls are usually either round or elongated. Round bowls are better if the toilet is going in a small room or awkward space, since they’ll leave you with more available floor space, but elongated bowls are the more comfortable of the two options and are frequent in commercial restroom applications. Based on the shape of the bowl, the toilet seat will be either round or elongated so it lines up with the edge of the bowl. Round bowls typically measure 16 to 17 inches from the mounting holes on the toilet seat to the front of the bowl’s rim. Elongated bowls have a slightly longer length and typically measure 18 to 19 inches. Both round and elongated bowls are usually about 14 to 14 and a half inches wide.
Toilet Bowl Height
Standard toilets are usually 15 to 17 inches above the floor. However, the height can vary with specialty toilets, like children’s toilets and wheelchair-accessible toilets. Handicapped-accessible toilets, for example, are typically 17 to 19 inches from the ground, since the slightly higher height makes it easier and more comfortable for individuals with disabilities, limited mobility, or wheelchair users.
Gallons per Flush
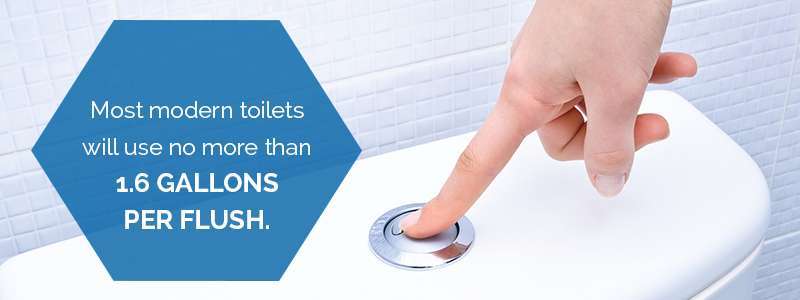
Your toilet’s gallons per flush tells you how much water your toilet uses each time it is flushed. This measurement should appear between the seat and the bowl. Most modern toilets will use no more than 1.6 gallons per flush. If your toilet doesn’t have a label indicating its gallons per flush amount, it is probably from before 1996, when the federal government put standards on how many gallons a toilet can use per flush to improve water conservation. Toilets from before 1995 often used up to seven gallons per flush.
Flush Lever
Depending on your toilet, your flush lever may be on the left or right-hand side of the toilet. So, when you’re thinking about where to place your toilet, consider what side the flush is on. Some people prefer a flush lever on one side versus the other. Some modern toilets are touch-free or have a flush button on the top of the tank, so these might be good options to consider if you’re tight on space. Touch-free and sensor-flush toilets are an excellent option for public settings to avoid the spread of germs.
How to Measure for a Toilet Seat
There are a variety of types of toilet seats and styles to choose from. Options include:
- Round — This is the standard toilet seat type, found in many homes and businesses. This shape is the most space-effective if you’re dealing with a tight or awkward space.
- Elongated — Elongated seats are slightly longer than a round seat. They are most frequent in homes or commercial applications. Many consider elongated seats to be the most comfortable.
- Open front — Open-front seats are common in public restrooms. Shaped like a U, open-front seats are the most sanitary option for public areas, since genitals won’t touch the seat and urine is less likely to hit the front of the seat.
- Children’s seats — Children’s seats are securely attached to the toilet, so they won’t shift or slide around. This setup makes them perfect for children learning to sit on the toilet. Children’s seats are also safe for adults, and they’re easy to remove when they’re no longer necessary.
- Raised/chair height — Raised seats are set higher than standard seats, making it easier to stand up after sitting. They are the best option for people with mobility challenges.
When measuring for your toilet seat, you’ll start by measuring the bolt width. On the back of the seat area, measure from the center of one post hole to the other. Typically, this measurement will be about five and a half inches between holes. Next, you’ll measure the width of the bowl at the widest point from rim to rim. This measurement will help you know how wide of a seat you’ll need to cover the rims of the bowl. Finally, measure the length of the toilet bowl. Measure from the center of the front of the bowl to the center of the seat hinges, between the post holes. For round seats, this measurement will be about 16.5 inches. For elongated bowls, it will be closer to 18 inches.
Understanding Bathroom Partitions
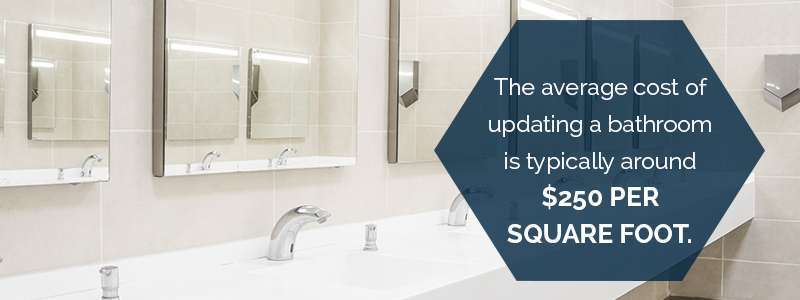
If you’re designing a public or commercial bathroom space, planning for a partition is an important consideration. In many cases, business owners get too focused on the bathroom hardware — the toilets, sinks, and hand dryers — and forget to factor in the partitions, which are a critical part of any public bathroom. There are specific guidelines on commercial restroom design mandated by the American Disabilities Act (ADA) and the Occupational Safety and Health Administration (OSHA). Failure to comply with these guidelines can subject your company to lawsuits, fines, and other troubles. The costs of redesigning are high: The average cost of updating a bathroom is typically around $250 per square foot, plus several thousand dollars for design costs.
Here are a few things the ADA and OSHA provide guidelines on:
- Toilets and number of employees — For small companies with 15 or fewer employees, OSHA requires businesses to have at least one lockable, unisex bathroom at their worksite. If you employ more than 15 people, the number of required toilets increases. You’ll also have to decide how to divide toilets between genders.
Here are the specific number requirements:
- 15 to 35 employees: two toilets
- 36 to 55 workers: three toilets
- 56 to 80 staff members: four toilets
- 81 to 110 employees: five toilets
- 111 to 150 workers: six toilets
- More than 150 employees: Install an additional toilet for every 40 employees hired.
- Partitions — According to OSHA guidelines, a barrier or partition that includes a door must separate all toilets to ensure employees’ privacy.
- Hand washing — In every bathroom at your worksite, you are required to have a sink where people can wash and dry their hands. All hand-washing stations must have a working faucet, soap, and some method for employees to dry off their hands, like paper towels or hand dryers.
- Accessibility — If your bathroom is accessible to the public, it must be accessible to disabled or handicapped individuals. Stalls must be big enough for a wheelchair or walker to easily enter and navigate. The bathroom also must have grab bars at the back and sides of the toilets and accessible flush controls. Not all states require you to make your restroom accessible to the public, but if you choose to do so, you’ll need to make sure it’s accessible to individuals with disabilities. Wheelchair-accessible toilet stalls, for example, must have a depth of at least 56 inches when the toilet is mounted to the floor.
You’ll have to consider these requirements, as well as your budget and space constraints, when designing your bathroom space. There are options to help you conserve space and save money, like urinals, but they don’t count towards OSHA’s requirements for the number of toilets you have on-site — you will still need to make sure you have at least two-thirds of the required number of toilets.
How to Measure Bathroom Partitions?
To measure bathroom partitions, you’ll need the measurements of your back wall, partition walls, pilasters, and door. For your back wall, measure the width, followed by the length, and height of your partition walls. Next, find the width and height of your pilasters and your door.
Measuring for a bathroom partition is one of the most crucial steps of commercial restroom design. However, this step is a little more complicated than measuring for the toilet. Since all bathrooms are different, there’s no standard measurement — the layout of your partition will depend on the layout of your bathroom. Commercial bathrooms typically have three types of layouts: recessed, alcove, and corner.
Typically, you’ll need to measure:
- Side wall to side wall
- Side wall to the center of the divider panel
- Door opening
- Back wall to front wall
- Stile width
If your bathroom has an alcove floor plan, you won’t need to measure the side walls or the center line distance. With a corner layout, you’ll also need to measure the distance between the panel’s center line and the outside of the panel. When measuring for a bathroom partition, here are basic steps to follow:
- Plan and visualize — You should make sure you have a good idea of your bathroom’s future layout. Start by creating a sketch of your bathroom. This drawing doesn’t have to be fancy — it’s just to give you an idea of how the final product will look and give you a place to record measurements.
- Measure from the back wall — To begin measuring, start by measuring the width of the entire back wall. Then, measure from the point on the back wall that’s farthest from the door.
- Measure the partition — Next, you’ll measure the height and length of your partitions. Make sure to measure where the door closes, and include this number in your measurement.
- Measure the pilasters — After you have your partitions measured, measure the pilasters, or the posts your partitions attach to. Usually, pilasters are taller and thinner than partitions.
- Measure the doors — Measure the height and width of every door. This step will help you make sure the door fits and can close properly, and that there aren’t unusual gaps between the door and the partition.
- Measure urinal partitions — If you’re installing urinals, you’ll also need to measure partitions for them. You’ll measure these partitions just like you did your other ones — measure and record the height and width.
Designing Your Bathroom Space
For businesses looking to add or improve upon their bathroom spaces, One Point Partitions offers bathroom partition design and delivery services to fit every need. As an experienced provider of bathroom partitions, we’ve worked with businesses across many industries to design solutions that fit their business’ exact needs.
As you project manage your commercial bathroom renovation, our team will work with you to create a custom design that fits your every need. We provide free samples, custom design consultations, and initial design mockups with no obligation, so you can be sure our design is the absolute best fit for your bathroom. With our top-notch customer service and delivery, we’ll ensure your project is completed quickly, effectively, and with the utmost attention to detail.
For more information or to get started on a design today, contact us at One Point Partitions. We’re happy to provide a quote if you have a sketch or picture, or you can use our pricing tool to get a quick pricing estimate without the wait.
Material Options
Now that you know exactly how to measure your toilet, complete the design of your commercial bathroom with top-quality toilet partitions from One Point Partitions. Below, you will find information on our different partition materials and their price points.
POWDER COATED STEEL RESTROOM PARTITIONS
STARTING FROM $375 PER PART
Powdered-coated steel partitions are the most inexpensive option, making it a popular choice for more modest budgets.
This price is for a single stall part. Part choices are Door, Panel, or Pilaster (qty 3 part minimum purchase required).
ECONOMICAL & DURABLE, 3-YEAR WARRANTY get a quote today!LAMINATE RESTROOM PARTITIONS
STARTING FROM $375 PER PART
Plastic laminate partitions are another attractively-priced model. These partitions are extremely open to customization and come in a wide range of colors.
This price is for a single stall part. Part choices are Door, Panel, or Pilaster (qty 3 part minimum purchase required).
A CLASSIC CHOICE, 5-YEAR WARRANTY get a quote today!SOLID PLASTIC RESTROOM PARTITIONS
STARTING FROM $450 PER PART
Solid plastic restroom partitions are heavy-duty, built to outlast even the roughest treatment, making them ideal candidates for high-traffic settings.
This price is for a single stall part. Part choices are Door, Panel, or Pilaster (qty 3 part minimum purchase required).
VERY LOW MAINTENANCE, 25-YEAR WARRANTY* get a quote today!PHENOLIC RESTROOM PARTITIONS
STARTING FROM $600 PER PART
Phenolic core partitions are durable, reliable and long-lasting while also remaining lightweight.
This price is for a single stall part. Part choices are Door, Panel, or Pilaster (qty 3 part minimum purchase required).
DURABLE & CONTEMPORARY, 25-YEAR WARRANTY get a quote today!STAINLESS STEEL RESTROOM PARTITIONS
STARTING FROM $700 PER PART
Stainless steel partitions have it all, from strength and stability to beauty and elegance, making them well worth the investment.
This price is for a single stall part. Part choices are Door, Panel, or Pilaster (qty 3 part minimum purchase required).
HIGH CLASS & HIGH QUALITY, 5-YEAR WARRANTY get a quote today!